How to Strap Kayak to Roof Rack: Safe, Simple, Step-by-Step Guide
Key Takeaways
- Choose the right rack and hardware: metal crossbars (24–36 in spread), saddles or J-cradles that match your hull, and 1 in polyester cam straps; confirm your vehicle’s dynamic roof load before you haul.
- Load smart and centered: set the kayak evenly on the crossbars, protect contact points, keep buckles 2–4 in off the hull, and avoid over-tightening to prevent oil-canning or gelcoat damage.
- Strap sequence matters: cinch two cam straps over the hull (one per crossbar), then add snug bow and stern lines to rated tow points for highway stability; skip bungees and avoid ratchet straps.
- Reduce noise and wear: add a 90° twist to long strap spans, tie off 6–12 in tails, pad sharp edges, and keep straps clear of exhaust, antennas, and sharp corners.
- Recheck routinely: shake-test before departure, stop after 5–10 miles to retension, then inspect every 50 miles or after weather changes; watch clearance for garages, branches, and low overhangs.
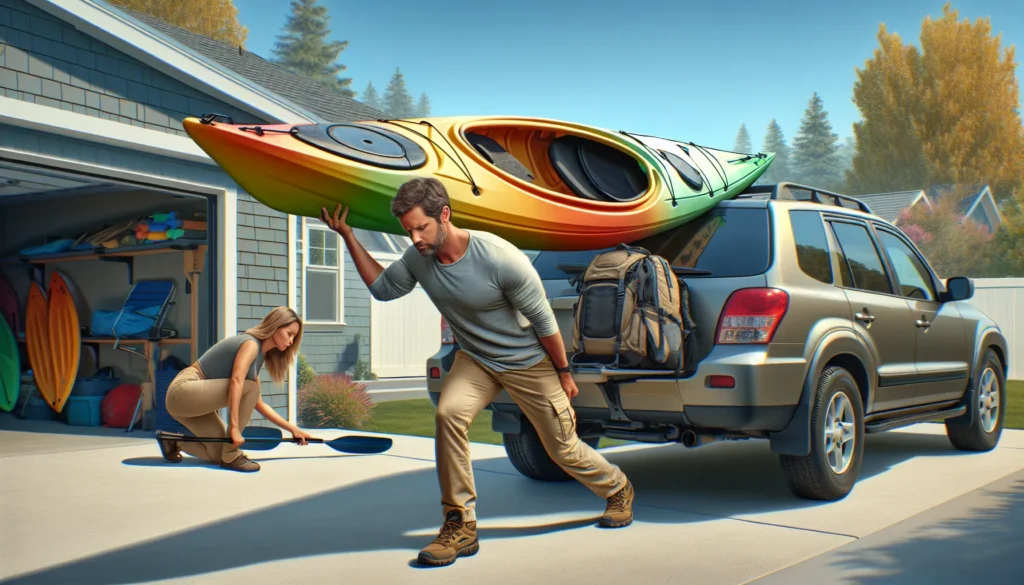
I love the freedom that comes with a kayak on the roof. But the first time strapping it down can feel tricky. I want to show you a simple way to get it secure fast so you can hit the water with confidence.
I’ll walk you through the right gear the setup and the steps. I’ll share smart checks that keep the boat snug at highway speeds. No knots you need to memorize. Just solid tie downs and a few habits that make every trip easy and safe.
Choosing The Right Roof Rack And Straps
I match the rack to my kayak and my vehicle roof load. I keep the strap system simple and strong.
- Crossbars: I use metal crossbars, like aluminum aero bars or steel square bars, for a stable strap kayak platform. I confirm a bar spread near 24–36 in for single boats, if my vehicle allows adjustment (REI Expert Advice, https://www.rei.com/learn/expert-advice/kayak-roof-rack).
- Factory racks: I check the owner manual rating for dynamic roof load, like 100–165 lb on many small SUVs, before I strap a kayak to a roof rack (Thule Fit Guide, https://www.thule.com and vehicle owner manual).
- Attachments: I pick saddles or J-cradles that fit my hull shape, if I see oil-canning risk on flat pads (Yakima How To, https://www.yakima.com/learn).
- Foam pads: I add closed-cell foam blocks on bare crossbars for grip and hull spread, if I run a temporary setup on rental cars (REI Expert Advice, https://www.rei.com/learn/expert-advice/kayak-roof-rack).
- Cam straps: I choose 1 in polyester cam straps with padded buckles for primary tie-down, if ratchets risk over-tightening thin composite hulls (American Canoe Association, https://americancanoe.org and REI).
- Bow lines: I use a non-stretch line to a metal tow point for bow control, if crosswinds or highway speeds are expected (ACA, https://americancanoe.org).
- Stern lines: I anchor the stern to a low, centered point for yaw control, if the kayak overhangs the rear crossbar by more than 3 ft (ACA, https://americancanoe.org).
- Rack locks: I add lock cores or cable locks for theft deterrence in lots, if the kayak sits on the car overnight (Yakima, Thule).
Recommended specs and limits
| Item | Recommended value | Notes | Source |
|---|---|---|---|
| Crossbar spread | 24–36 in | Wider helps long sea kayaks | REI Expert Advice |
| Strap width | 1 in | Polyester resists stretch when wet | REI Expert Advice |
| Cam strap WLL | 200–300 lb per strap | Working Load Limit, avoid over-tension | Manufacturer specs, REI |
| Vehicle dynamic roof load | 100–220 lb | Include rack weight and kayak weight | Thule Fit Guide, owner manual |
| J-cradle angle | ~45° | Reduces roof footprint on narrow cars | Yakima How To |
| Bow and stern lines | 1 pair | One forward, one rear for stability | ACA Safety |
I prioritize fit and contact where the kayak meets the rack. I keep at least two contact points per side, if the hull is rounded or slick. I place the kayak cockpit up on saddles for even strap kayak pressure, if the deck has accessories like rod holders.
I verify numbers before purchase. I add kayak weight, rack weight, and accessory weight, if I check the roof load line in the manual. I compare strap labels for WLL and material, if the product page lists only break strength.
- REI Co-op Expert Advice, Kayak Car Racks and Transportation, https://www.rei.com/learn/expert-advice/kayak-roof-rack
- American Canoe Association, Transporting Your Boat, https://americancanoe.org
- Yakima, Learn Center, https://www.yakima.com/learn
- Thule, Fit Guide and Load Ratings, https://www.thule.com
Prepping Your Vehicle And Kayak

Inspect the roof rack
- Confirm the dynamic roof load in the owner’s manual before loading the kayak if the rating varies by trim or accessories (Owner’s Manual).
- Verify the crossbar spread matches your kayak length if the hull flexes with narrow spacing (REI Co-op).
- Tighten the towers to manufacturer spec if the crossbars show play under hand force (Thule Fit Guide, Yakima Support).
- Check the bar contact for full pad coverage if the bars have exposed metal that could abrade the hull.
Prepare the kayak
- Rinse salt, sand, and grit from the hull if debris could scratch the roof rack pads.
- Empty the hatches and cockpit if loose gear could shift during highway wind.
- Pad sharp hardware with tape if perimeter lines or rudder parts touch the roof rack.
- Center visible load marks from past trips if the kayak tracks straight on the crossbars.
Stage straps and anchors
- Lay 2 cam straps over the roof rack before lifting the kayak if the parking area is tight for movement (REI Co-op).
- Set bow and stern lines at factory tow points if the bumper lacks steel loops.
- Place soft-loop anchors under the hood for the bow line if no metal recovery points exist.
- Inspect strap webbing for cuts and melted spots if the kayak rides long distances in sun.
Protect the vehicle
- Fit crossbar pads or foam blocks on the roof rack if the kayak has an oil-canning prone hull.
- Add a bath towel over the rear bar if you plan a slide-up load from the tailgate.
- Use a step stool next to the vehicle if the roof rack height exceeds your reach by 8 in.
Plan the loading zone
- Park on level pavement if the kayak could roll off the roof rack during lift.
- Face the vehicle into the wind if gusts exceed 15 mph.
- Clear 6 ft on both sides for lifting room if the kayak length exceeds 10 ft.
Verify hardware and tools
- Keep a 4 mm to 6 mm hex key for rack towers if the system uses Allen fasteners.
- Carry a spare cam buckle and strap keeper if a buckle spring sticks.
- Pack a microfiber cloth for strap threading if wet webbing slips through the cam teeth.
Quick prep specs
| Item | Count or Range | Example or Source |
|---|---|---|
| Crossbars | 2 | Factory or aftermarket, padded |
| Cam straps | 2 | 12 ft to 15 ft length, 1 in width, polyester, REI Co-op |
| Bow line | 1 | Static line or ratchet block, REI Co-op |
| Stern line | 1 | Static line or ratchet block, REI Co-op |
| Anchor points | 4 | 2 crossbars, 2 tow points |
| Dynamic roof load | 75 lb to 220 lb | Owner’s Manual, Thule Fit Guide |
| Crossbar spread | 24 in to 36 in | REI Co-op Expert Advice |
| Working Load Limit | 200 lb to 400 lb per strap | Manufacturer label |
Final readiness checks
- Measure kayak balance at the carry handle if the center mark aids roof rack centering.
- Align the cockpit behind the front bar if the coaming could catch wind.
- Confirm equal overhang at the bow and stern if state rules limit rear projection.
Loading The Kayak Safely Onto The Roof Rack
Loading the kayak safely onto the roof rack starts on the ground. I stage the boat parallel to the vehicle on the wind-sheltered side if gusts pick up.
Two-person lift
- Face the hull toward the rack, then assign ends to each lifter, for example bow to me stern to a partner.
- Grip the cockpit rim or solid carry handles, then keep hands outside the thigh braces.
- Lift with legs not back, then raise the kayak to chest height in one motion.
- Walk the kayak to the rear crossbar or J-cradles, then keep the bow slightly higher than the stern.
- Set the hull on the rear support first, then ease the kayak forward onto both supports.
Solo loading with rear assist
- Place a pad, roller, or bath towel on the rear crossbar or trunk edge for low friction.
- Tilt the bow onto the pad at hip height, then keep the stern on the ground.
- Slide the kayak forward along the pad until the center clears the rear bar.
- Center the hull over the crossbars or into J-cradles, then keep contact on both sides.
- Rotate the kayak to match the hull shape with saddles or posts if the deck sits crooked.
Micro-adjust and balance checks
- Confirm equal overhang front and rear, then move the kayak until bow and stern balance within 2 in.
- Align the keel over the vehicle centerline, then offset up to 1–2 in only if a fin or rudder interferes.
- Check that contact points sit on load-bearing hull areas, for example flat sections near bulkheads.
- Protect the rudder or skeg with a foam block, then lock the blade in the up position before strapping.
Wind and slope controls
- Anchor a temporary bow line to a front tow point, then hold light tension while sliding the kayak.
- Chock the wheels on steep driveways, then load from the uphill side to cut lift height.
Strap staging before cinching
- Thread cam straps under both crossbars or through cradle slots, then place the buckles on the tall side.
- Toss the tag end over the kayak, then keep the buckle away from the hull to prevent scuffs.
- Add a short strap around the bow at the front bar as a keeper, then cinch lightly until final positioning.
Quick visual safety scan
- Scan mirrors and the hatch path for interference, for example antenna whips or hatch spoilers.
- Verify hatch clearance on SUVs by cracking the hatch, then stop if the stern touches trim.
- Flag any rear overhang with red cloth in daylight or red light at night, then follow state limits.
Numbers I use for safe loading
| Metric | Value | Context | Source |
|---|---|---|---|
| Ideal lift angle | 30–45 degrees | Reduces strain during solo slide | American Canoe Association, https://americancanoe.org |
| Rear overhang limit | 3–4 ft | Flag required beyond threshold | AAA Digest of Motor Laws, https://drivinglaws.aaa.com |
| Crossbar contact points | 2 | Even support for hull | REI Co-op Expert Advice, https://www.rei.com/learn/expert-advice |
| Bow line tension | Hand-snug | No bend in deck or hull | Thule Transport Tips, https://www.thule.com |
| Side offset tolerance | 0–2 in | Keeps centerline tracking true | Yakima Knowledge Base, https://support.yakima.com |
I base these steps on ACA loading guidance, REI’s car-top transport instructions, and rack maker recommendations, which cover lift mechanics, hull support, and legal overhang for public roads.
Step-By-Step: How To Strap Kayak To Roof Rack

I lock the kayak to the roof rack with a simple sequence. I keep angles low and contact points broad for stability at highway speed.
Position The Kayak And Straps
- Center the kayak on the crossbars, then align the midpoint with the crossbar span.
- Seat the hull on saddles or J-cradles, then confirm even contact across 3 points.
- Offset the cockpit slightly to the passenger side, then leave 2 in clearance from antenna mounts.
- Stage 2 cam straps at the front bar and 2 at the rear bar, then place buckles on the high side.
- Flip strap tails over the kayak, then keep tails out of doors and away from exhaust.
Thread And Tighten Cam Straps
- Route the strap over the kayak, then drop it down between the bar and tower.
- Thread the tail through the cam buckle, then pull down to remove slack.
- Set the strap just behind the buckle, then press the cam with one hand and tension with the other.
- Cinch until the hull compresses slightly, then stop short of deformation.
- Tie off the free tail with a half hitch at the buckle, then keep 6 to 12 in of tail.
Secure Bow And Stern Lines
- Attach a bow line to a rated front point, then use tow hooks or hood loops if anchors are absent.
- Attach a stern line to a rear tow point, then avoid plastic fascia and thin sheet metal.
- Tension each line until snug, then keep the kayak centered on the roof rack.
- Use non‑stretch rope or ratchet bow stern kits, then avoid bungee cords.
- Follow ACA and manufacturer transport guidance, then match line angles to center the keel.
Check Tension, Protect Contact Points, And Add Strap Twists
- Inspect each strap for 10 to 15 degrees of deflection when plucked, then re‑cinch if loose.
- Verify zero kayak slide with a firm side shake, then retension the tighter strap last.
- Pad sharp edges with rubber or foam, then place guards under buckle hardware.
- Add a 90 degree twist to long strap spans, then cut wind hum and stop flutter.
- Lock strap ends and lines with stopper knots, then stow tails away from tires and brakes.
| Item | Count or Range | Context |
|---|---|---|
| Cam straps | 2 to 4 | 1 to 2 per crossbar depending on cradles |
| Strap width | 1 in | Polyester cam straps with metal cams |
| Crossbar spread | 24 to 36 in | Match kayak length and hull shape |
| Bow and stern lines | 2 | One front, one rear per kayak |
| Working Load Limit per strap | 200 to 400 lb | Follow label from Thule Yakima NRS |
| Strap twist | 1 per span | Add on the longest run to reduce noise |
Common Mistakes To Avoid
Avoid these common mistakes when strapping a kayak to a roof rack.
- Using ratchet straps increases crush risk on composite or rotomolded hulls, and I use polyester cam straps per ACA and REI guidance
- Skipping bow and stern lines reduces yaw stability in crosswinds, and I add them as ACA transport basics
- Placing buckles on the hull creates pressure points and scratches, and I keep buckles 2 to 4 in off the kayak edge
- Over‑tightening flattens chines and oil‑cans decks, and I stop when the kayak no longer shifts under a firm shake test
- Under‑tightening leaves slack that creeps at speed, and I recheck strap tension after 5 to 10 minutes on the road
- Crossing straps over cockpits or hatches warps covers, and I route straps outside openings and across solid hull
- Running straps over sharp edges cuts fibers, and I pad contact at crossbar corners and buckle backs
- Leaving long strap tails creates whips and noise, and I tie off 6 to 12 in tails with a stopper knot near the rack
- Skipping strap twists makes loud humming at highway speeds, and I add 1 to 2 half twists in the span between bars
- Ignoring roof load ratings risks rack failure, and I keep total weight under the vehicle dynamic roof load
- Mixing incompatible cradles and hull shapes reduces contact area, and I match saddles or J‑cradles to the kayak profile
- Trusting worn gear invites failure, and I retire frayed webbing or corroded buckles at first sign of damage
- Using too‑narrow straps concentrates load on the hull, and I stick with 1.0 to 1.5 in webbing for better distribution
- Setting too‑short crossbar spread lowers roll resistance, and I target 24 to 36 in spread when rack fit allows
- Skipping post‑load checks hides movement, and I tug the bow and stern plus each strap before every drive
- Delaying en‑route inspections increases risk, and I stop to recheck ties every 25 to 50 miles or after strong gusts
- Forgetting non‑stretch materials adds slack in rain, and I favor polyester over nylon for transport
- Loading off‑center shifts weight toward one tower, and I center the keel on the bars or in the cradles
- Blocking escape of strap vibration wastes time, and I secure tag ends against the strap body not mirror stalks
- Anchoring to weak points fails under braking, and I use frame mounted or hood loop points per manufacturer guides
| Item | Numeric guidance | Source |
|---|---|---|
| Buckle offset from hull edge | 2–4 in | ACA, REI Expert Advice |
| Strap width | 1.0–1.5 in | Thule, Yakima manuals |
| Crossbar spread | 24–36 in | Thule, Yakima fit guides |
| Tail length to tie off | 6–12 in | REI Expert Advice |
| En‑route recheck interval | 25–50 miles | ACA transport guidance |
| Strap twists per span | 1–2 | Field practice, REI staff picks |
| Vehicle dynamic roof load | Per manual, often 100–165 lb | OEM owner’s manuals |
| Working load limit per cam strap | 200–400 lb | Thule, Yakima strap specs |
Driving Tips And Safety Checks
- Drive conservatively with the kayak strapped on the roof rack, keep smooth inputs on throttle, brake, and steering to limit sway and strap creep REI Expert Advice, Yakima.
- Keep the kayak centered between crossbars, watch for side gusts from trucks and gaps in trees on highways REI Expert Advice.
- Maintain extra following distance, aim for a longer time gap so sudden stops do not spike load shift AAA.
- Scan for strap signals, listen for new noises like humming or thumping that indicate loose cam straps or vibrating bow lines Yakima.
- Avoid high-pressure wash bays and automatic carwashes, protect the kayak, the cam buckles, and the roof rack from impact Thule Guide.
- Bypass low-clearance structures, account for total height with the kayak on the roof rack before garages, drive-thrus, and tree limbs REI Expert Advice.
- Pull over if the kayak shifts, retension cam straps, reset bow and stern lines, and add a half twist to long spans to cut flutter REI Expert Advice.
- Park out of headwinds, face the bow into the wind when possible to reduce uplift on the hull and the crossbars Yakima.
- Plan gentle routes, pick roads with lower speeds, fewer crosswinds, and smoother surfaces when hauling a strapped kayak AAA.
On-the-road Rechecks
- Stop early for a quick recheck, pull over after a short first leg to confirm cam strap tension and bow or stern line knots Yakima.
- Recheck at steady intervals on long drives, touch the buckles, tug each strap run, and verify the kayak stays centered on the roof rack REI Expert Advice.
- Inspect after weather changes, tighten after rain, wind, or temperature swings that relax webbing and knots REI Expert Advice.
Clearance And Spacing Checks
- Measure total height before trips, add the kayak thickness on saddles or J-cradles to the vehicle roof height for safe clearances REI Expert Advice.
- Mark the height on a dash note, keep it visible so garages and overhangs stay off limits when the kayak sits on the roof rack AAA.
- Verify lateral overhangs, keep the bow and stern inside mirror width where possible to reduce side strikes in tight lanes Yakima.
Quick Safety Table
| Item | Target number | Context | Source |
|---|---|---|---|
| First recheck stop | 5–10 miles | Early strap retension and line inspection | Yakima |
| Ongoing rechecks | Every 50 miles or 1 hour | Highway legs and fuel stops | REI |
| Following distance | 4+ seconds dry, 6+ seconds wet | Extra gap for roof loads | AAA |
| Clearance buffer | +6–12 in | Margin over measured total height | REI |
Before You Depart
- Confirm buckle positions off the kayak edge, keep cam buckles 2–4 in away from the hull to prevent scuffs on gelcoat or ABS.
- Confirm no strap contact with hot exhaust or sharp edges, route clean lines from crossbar to crossbar and to bow or stern anchors.
- Confirm rack and anchors feel solid, shake test the kayak, the crossbars, and the bow or stern lines for movement under hand.
While You Drive
- Watch the bow line in your peripheral vision, treat new flutter or slack as a stop signal for a strap check.
- Watch speed on open stretches, favor moderate cruising to limit aerodynamic lift on the bow and stress on cam straps.
- Watch spacing in traffic, leave room for gradual braking so the strapped kayak stays settled on the roof rack.
When You Stop
- Touch each cam strap, press the webbing near the buckle and pull the tail to confirm firm tension without hull deformation.
- Tug bow and stern lines, feel for even tension, then retie the trucker’s hitch or cleat hitch if knots loosened.
- Check crossbar alignment, look for bar roll or spread changes after potholes, then reseat the kayak if it drifted.
Removing And Storing Your Gear
Remove and store my gear in a set sequence that prevents drops and protects straps.
Unloading sequence
- Loosen cam straps first at the downwind side, for control in gusts.
- Release bow and stern lines second, for slack removal without shifting the hull.
- Remove loose strap tails third, for tangle-free lifting.
- Lift the kayak with a partner at bow and stern grab handles, for stable offload.
- Slide the kayak to a padded landing zone, for hull protection on asphalt or gravel.
- Coil each strap into 6–8 in loops, for compact stowing in a dry bag.
Drying and cleaning
- Rinse straps, buckles, and lines with fresh water after salt exposure, ACA and NRS recommend salt removal to limit corrosion.
- Wipe cam buckles and hooks dry, Thule notes that trapped moisture accelerates corrosion on springs and pins.
- Air dry webbing and lines for 30–60 minutes in shade, UV degrades polyester fibers over repeated sun cycles per manufacturer care guides.
- Brush sand from J-cradles and saddles with a soft brush, grit can score gelcoat and anodized parts.
Strap and hardware care
- Inspect webbing for cuts, glazing, and frayed edges after each trip, replace if the damage reaches the woven core.
- Check cam buckles for full tooth engagement and spring return, light silicone spray restores action if salt stiffens the hinge.
- Verify labels for working load limit and strap width, replace unreadable tags to keep specs visible.
- Store straps and lines in a breathable bag, avoid sealed bins unless everything is fully dry.
- Park straps away from solvents and fuel fumes, petrochemicals weaken fibers over time.
Rack and accessory storage
- Remove foam pads, soft racks, and kayak saddles after multi-day trips, trapped moisture marks clear coat.
- Wipe crossbars and towers with mild soap and water, Yakima and Thule advise non-abrasive cleaners only.
- Stow small hardware like bow shackles, hood loops, and rubber bow guards in a labeled pouch, examples include dry pouches and mesh ditty bags.
- Hang wet gear in a ventilated garage or gear room, avoid direct heater airflow that can warp plastics.
Packing checklist
- Count items before and after loading, count 2 straps, 2 lines, 2 anchors.
- Bag small parts together, bag buckles, hooks, and carabiners.
- Log maintenance notes, log frayed strap ends, sticky cams, missing end caps.
Quick reference
| Item | Target action | Numeric guidance | Source cue |
|---|---|---|---|
| Cam straps | Air dry in shade | 30–60 min | NRS care guidance |
| Bow and stern lines | Inspect then coil | 6–8 in loops | ACA transport tips |
| Storage temperature | Keep cool and dry | 50–77°F | Rack maker manuals |
| Salt rinse | Freshwater rinse | 1–2 minutes | Thule maintenance |
| Re-inspection | After trip count | 4 checks per month on frequent use | Personal workflow |
Store my gear clean, dry, and labeled for fast rigging on the next launch.
Conclusion
Strapping a kayak to a roof rack can feel intimidating at first. With a calm approach and a little practice it becomes a smooth part of the adventure. I focus on staying patient staying organized and trusting a simple routine. That keeps stress low and the stoke high.
Before every drive I take one last breath and give everything a quick tug test. If something feels off I fix it on the spot. When it all feels solid I hit the road with confidence. You have the know how. Lean on it. Keep safety first and the water days will keep getting better.
Frequently Asked Questions
What’s the safest way to strap a kayak to a roof rack?
Use two polyester cam straps over the hull, plus bow and stern lines. Seat the kayak on saddles or J-cradles, center it, then run straps down and around each crossbar. Tighten until snug, not crushing. Keep buckles 2–4 inches from the hull edge, and add one twist in the strap to reduce flutter. Finish with stopper knots on tag ends.
Which roof rack works best for kayaks?
A rack with metal crossbars and kayak-specific saddles or J-cradles is best. Match the rack to your vehicle’s dynamic roof load rating and your kayak’s hull shape. Aim for 28–36 inches of crossbar spread. For temporary setups, use foam blocks with cam straps and bow/stern lines.
How tight should the cam straps be?
Tight enough that the kayak cannot shift side to side or bounce, but not so tight that the hull deforms. Use hand tension only on cam straps—no cheater bars. If you see denting, loosen slightly and improve contact points with saddles, pads, or cradles.
Are ratchet straps OK for kayaks?
No. Avoid ratchet straps because they easily over-tighten and can crack or dent the hull. Use 1-inch polyester cam straps with a working load limit of at least 200–300 lb per strap, and secure bow and stern lines for stability.
Do I need bow and stern lines?
Yes. Bow and stern lines prevent fore-aft wobble and sail effect at highway speeds. Attach to solid tow points (or trunk/hatch anchors), tension until snug, and recheck after the first 5–10 miles. They add critical redundancy in wind and at speed.
How do I position the kayak on the rack?
Center the kayak left-to-right. On saddles, place it hull-down with even contact. In J-cradles, load on the side and rotate into the cradle. Keep the cockpit roughly centered between crossbars, with 28–36 inches of spread for most 10–14 ft kayaks.
What strap length and width should I use?
Use two 12–15 ft, 1-inch polyester cam straps for the hull, plus two lines for bow and stern. Polyester minimizes stretch and over-tightening compared to nylon. Check strap working load limits (WLL) and avoid frayed or corroded hardware.
How fast can I drive with a kayak on the roof?
Drive conservatively and under posted limits, especially in wind. Increase following distance to 4–6 seconds. Watch for strap flutter or movement in mirrors. Recheck straps after 5–10 miles, then every 50–100 miles or after heavy rain, wind, or temperature swings.
How do I reduce wind noise from straps?
Add a half twist to the strap span between the buckle and crossbar to disrupt airflow. Keep buckles off the hull and away from edges. Tuck or tie tag ends. Fairing attachments and low-profile cradles can also help.
What are common mistakes to avoid?
- Using ratchet straps
- Skipping bow/stern lines
- Over-tightening cam straps
- Poor crossbar spread
- Buckles rubbing the hull
- Loose tag ends flapping
- Not rechecking after the first few miles
How do I protect my car and kayak during loading?
Use foam pads or towels at contact points, and cover sharp rack edges. Keep the kayak and rack clean to avoid grit scratches. Plan a clear loading zone, mind overhead clearance, and lift with a partner when possible.
How do I check if the kayak is secure before driving?
Shake the kayak side-to-side and fore-aft; the car should move with it. Verify both cam straps are snug, buckles positioned near hull edges, tag ends tied, and bow/stern lines tensioned. Do a final mirror check for symmetry and strap twists.
What should I do during long trips?
Stop after 5–10 miles to retension. Recheck every 50–100 miles, at fuel stops, and after weather changes. Confirm strap tension, line knots, and contact points. Inspect for rubbing, noise, or shifting and fix immediately.
How do I safely unload the kayak?
Park on level ground. Loosen cam straps while holding the kayak, then release bow and stern lines. Lift with a partner—one at bow, one at stern—and clear the rack before lowering. Avoid dragging the hull or dropping hardware on the car.
How should I care for straps and hardware after trips?
Rinse with fresh water, especially after salt or dusty roads. Dry completely to prevent mildew and corrosion. Inspect buckles, webbing, and hooks for wear, then store in a clean, labeled bag in a dry place. Replace any frayed or damaged gear promptly.