How Do You Sit in a Kayak? Posture, Fit, and Tips for Sit-In & Sit-On-Top Kayaks
Key Takeaways
- Aim for a neutral posture: sit bones evenly planted, slight forward hip hinge, tall spine, relaxed shoulders, and head centered—this keeps the kayak stable and your core engaged.
- Set foot pegs for a soft knee bend (about 110–130°); press through the balls of your feet, keep light knee/thigh contact for edging, and alternate foot pressure to drive rotation.
- Adjust seat and back band: add a slight forward seat tilt (3–6°) to free hip rotation, keep hip pad gaps small but comfy, and set the back band low and snug to support the sacrum without blocking torso movement.
- Match your setup to the kayak: firmer foot/thigh/lumbar contact in sit-in kayaks; balanced hips, footwell drive, and optional thigh straps in sit-on-top models—tighten contact in chop, relax on flats.
- Prevent common mistakes: avoid slouching, leaning back, and locked knees; use micro-movements (small edges, pelvic rock, rib slide), low belly breathing, and a light paddle grip for comfort and control in calm or rough water.
I still remember the first time I slid into a kayak and felt a little off balance. Sitting right makes everything feel steady and fun. It sets me up for smooth paddling and keeps my back and hips happy. If I get it wrong I feel wobbly and tired fast.
In this guide I’ll share how I sit so the kayak feels like part of me. I’ll show how I position my hips feet and back so I stay upright and relaxed. Whether you’re new or brushing up you’ll learn simple steps that make a big difference on the water.
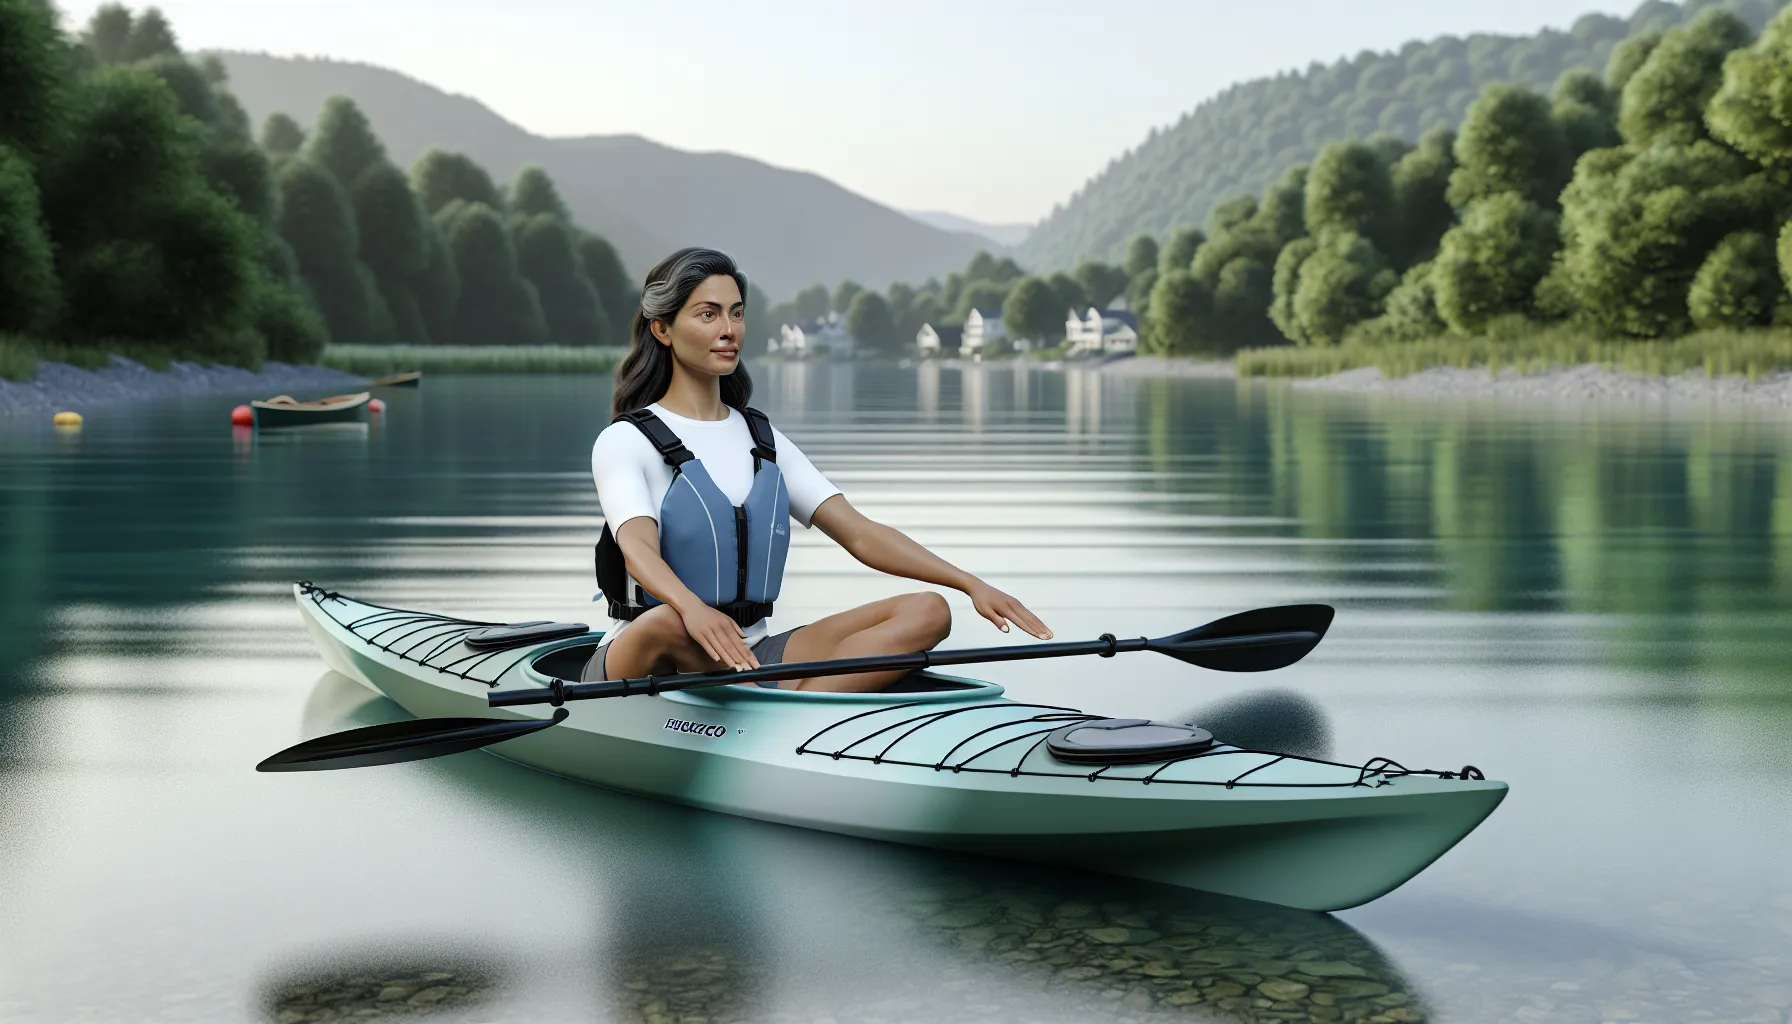
How Do You Sit In A Kayak: The Essentials
Sitting in a kayak starts with a balanced setup. I center my body so the kayak stays responsive.
Neutral Posture: Hips, Spine, And Shoulders
A neutral posture keeps the kayak stable and my core active. I hold a slight forward tilt from the hips for efficient strokes per American Canoe Association guidance (ACA, 2020).
- Plant the sit bones evenly on the seat for level hip contact
- Center the pelvis with a small forward hinge for torso rotation
- Stack the spine long with natural curves for rib mobility
- Relax the shoulders down for free blade entry
- Engage the lower ribs and belly for steady power transfer
- Align the head over the stern to bow line for balance cues
- Breathe low through the belly for rhythm in choppy water
Foot Pegs, Knees, And Thigh Contact
Foot and thigh contact anchor my body so the kayak tracks clean. I fine tune contact points to match the cockpit fit per British Canoeing and ACA safety notes (British Canoeing, 2019, ACA, 2020).
- Place both heels on the hull and both balls of the feet on the pegs
- Adjust the pegs so knees hold a soft bend at about 120 degrees
- Flex the ankles to press forward for leg drive on each stroke
- Touch the inner knees lightly to the deck for bracing feedback
- Seat both thighs under the braces for edge control and rolls
- Rotate through the hips as the feet alternate pressure for cadence
- Loosen contact slightly on flatwater and increase contact in surf for control
Sit-In Vs. Sit-On-Top: Seating Differences
I match my sit kayak posture to the boat design. I aim for firm contact in a sit-in, and relaxed balance in a sit-on-top.
Cockpit Fit And Thigh Braces
I treat a sit-in kayak like a fitted shell. I create contact at feet, thighs, and lower back for clean edging and quick braces.
- Set foot pegs for a soft knee bend and solid ball-of-foot contact.
- Place knees under thigh braces for light upward pressure.
- Press hips into pads for centered sit kayak control.
- Engage core, not shoulders, for rotation and power.
- Relax grip on the paddle for loose wrists and fast recovery.
- Breathe low to keep ribs soft during chop.
I track these sit kayak fit ranges for repeatable setup.
| Fit Element | Target Range | Notes |
|---|---|---|
| Knee bend angle | 110–130° | More angle for surf, less for flatwater |
| Hip pad clearance | 1–2 finger widths | Even gap on both sides |
| Foot peg distance | Slight knee flex | Toes neutral, heels grounded |
| Back band height | Low lumbar contact | Avoid rib cage pinch |
| Thigh brace contact | Light to moderate | Increase pressure only when edging |
I keep contact light, unless wind or current pushes me off line.
Open Deck Balance And Footwell Use
I treat a sit-on-top like a stable platform. I balance from the hips, and I drive from the feet.
- Sit centered on the seat pan for a low kayak center.
- Slide hips, not shoulders, for trim and balance changes.
- Plant heels in the footwells for leg drive during strokes.
- Press alternately through the feet for torso rotation.
- Clip thigh straps, like surf SOTs or fishing SOTs, for extra control in waves.
- Loosen straps, like on flat bays or lakes, for comfort and circulation.
I track these sit kayak deck fit points to stay efficient.
| Deck Element | Target Range | Notes |
|---|---|---|
| Seat height above deck | 1–3 in | Lower for chop, higher for sight-fishing |
| Footwell choice | Closest that keeps knees soft | Switch wells for trim changes |
| Thigh strap tension | Snug without pull marks | Tighten in surf, relax on flats |
| Hip movement | Small lateral shifts | Move weight before the paddle stroke |
I keep my posture neutral, unless side swell stacks or a crosswind loads one edge.
Adjusting Your Seat And Back Support
I dial seat and back support first to lock posture without blocking rotation. I keep contact firm at the hips, feet, and lumbar so edging stays crisp.
Seat Angle, Padding, And Hip Support
- Set the seat pan with a slight forward tilt to stack the spine and free hip rotation.
- Set 5–10° forward tilt for active paddling, set neutral 0–3° for relaxed cruising.
- Add thin foam under the sit bones to reduce tailbone pressure.
- Add 6–12 mm minicell under ischial points, add up to 18 mm if a hard bucket causes hotspots.
- Leave hip pad clearance for edging without pinch.
- Leave 1–2 finger widths per side in a sit‑in kayak, leave 2–3 finger widths in a sit‑on‑top with thigh straps.
- Place thigh contact to connect knees without lifting the butt.
- Place pads so knees touch lightly at rest, place firmer contact for surf, rock gardens, or rolling.
- Test trim with three forward strokes and a stop.
- Test for straight glide without wobble, test again after 20 minutes as tissues warm up.
Backband Height And Tension
- Set backband height to support the sacrum while leaving the lumbar free to hinge.
- Set the top edge near L3–L4 for sit‑in whitewater and touring, set slightly higher for sit‑on‑top seats with tall backs.
- Tension the backband to keep the pelvis upright without blocking torso rotation.
- Tension until the belt holds contact on exhale, tension less if rotation feels sticky.
- Anchor the band low on the seat posts or hull fittings for a stable pull.
- Anchor symmetrically, anchor with equal ratchet clicks or strap lengths.
- Check PFD clearance so the band doesn’t ride into the vest.
- Check for no overlap with the PFD back panel, check for no pressure on the lower ribs.
- Recheck on water with sweep strokes, braces, and a gentle edge.
- Recheck for no lift of the seat when you lean, recheck for no slouch when you relax.
Numbers at a glance
| Setting | Sit‑in kayak | Sit‑on‑top kayak | Purpose |
|---|---|---|---|
| Seat pan tilt | 5–10° forward, 0–3° neutral | 3–8° forward | Stack spine, reduce tailbone load |
| Padding thickness | 6–12 mm under sit bones | 6–18 mm under sit bones | Disperse pressure, improve grip |
| Hip pad gap | 1–2 finger widths | 2–3 finger widths | Allow edging, prevent pinch |
| Backband top | At L3–L4, about 2–3 in above sacrum | Mid lumbar, below PFD back | Support sacrum, keep rotation |
| Backband tension | Firm on exhale, no lift on lean | Firm yet compliant | Upright pelvis, free torso |
I align these settings with guidance from the American Canoe Association and British Canoeing resources on posture and outfitting, which emphasize neutral pelvis, engaged core, and unrestricted rotation for efficient strokes and safe edging (ACA, British Canoeing).
Comfort Without Losing Control
I sit for comfort and I keep contact for control. I pair soft breathing with light anchors so the kayak stays responsive.
Core Engagement And Relaxed Upper Body
I brace my core lightly and I let my shoulders relax. I stack my ribs over my hips and I keep my neck long. I breathe low into my belly and my sides to keep a steady stroke rhythm. I keep a loose grip and I let my wrists stay neutral to reduce tension. I pull from my lats and I set my scapulae down before each catch for clean power. These cues align with ACA and British Canoeing posture guidance and with endurance bracing research by McGill and NSCA references.
- Breathe through the nose on recovery and through the mouth on power for quick gas exchange
- Keep the paddle grip just firm enough to stop slip not squeeze
- Let elbows float near 90° at mid pull for joint efficiency
- Keep the backband as a touch not a crutch to protect rotation
Numbers and targets
| Cue | Target | Source |
|---|---|---|
| Core brace effort | 15–30% perceived tension | McGill 2010 back endurance guidance |
| Breath rate under steady pace | 8–14 breaths per min | British Canoeing coaching notes |
| Grip pressure | 2–3 on a 0–10 scale | ACA instructor cues |
| Elbow angle at mid pull | 80–100° | ACA forward stroke clinic |
Micro-Movements And Hip Mobility
I let my hips steer and I let my feet drive. I keep my pelvis free so the hull can edge without big motions. I time tiny shifts with the stroke and with the wave face for balance.
- Edge 3–5° by lifting one knee and relaxing the other for a stable carve
- Roll the pelvis forward 5–10° to free rotation then return to neutral on recovery
- Swap foot pressure right to left each stroke to load the rail and keep tracking
- Slide the ribcage 1–2 cm over the working hip to stack mass over support
- Pulse the thighs into the braces in chop for 0.5–1.0 s then release to avoid fatigue
I match these micro moves to the kayak type and contact points from the prior section for consistent feel. ACA and British Canoeing coaching resources describe the same small edged movements for control in dynamic water.
Getting Into Position On The Water
I set posture before the first stroke. I lock light anchors, then I free rotation.
Entering, Settling, And Quick Posture Checks
- Place the kayak parallel to knee-deep water, then brace the paddle across the cockpit and shore or dock.
- Place the near blade behind me on the deck, then load my weight over that brace.
- Slide my butt to the seat center, then draw my feet to the pegs.
- Plant my feet on the pegs, then center my pelvis over the keel line.
- Float my knees toward the braces, then keep contact light for feel.
- Set my back band at hip-bone height, then leave space for rotation.
- Drop my shoulders, then lengthen the back of my neck.
- Breathe low through the ribs, then match exhale to small waves.
- Enter sit-in: step in with one foot, then sit and bring the second foot through.
- Enter sit-on-top: sit first, then bring feet to the footwells.
- Check trim by pausing with the paddle low, then watch if the bow rises or buries.
- Check balance by lifting one knee a finger width, then feel edge response.
- Check reach by tapping the toes on the pegs, then confirm no knee lock.
- Check contact by sliding two fingers behind the hip pads, then confirm free hips.
- Check rotation by touching my PFD zipper to each thigh, then feel smooth return.
Quick metrics
| Feature | Target | Context |
|---|---|---|
| Knee bend | 110–130° | Power without knee lock |
| Foot peg clearance | 5–10 mm toe wiggle | Contact without cramp |
| Back band height | At iliac crest | Support without blocking rotation |
| Thigh pressure | 10–20% max effort | Light anchor for edging |
| Seat pan tilt | 2–4° forward | Stacked spine and free hips |
I confirm these fit cues against ACA and British Canoeing posture guidance, then I adjust if conditions change. Sources: American Canoe Association Essentials of Kayak Touring, British Canoeing Personal Performance Awards.
Common Mistakes And Quick Fixes
Mistakes sneak into posture fast on moving water. I spot them early and plug quick fixes that keep me balanced as I sit in a kayak.
Slouching, Leaning Back, And Locked Knees
Slouching, leaning back, and locked knees break neutral posture and waste power.
- Fix slouching: Stack ribs over pelvis and grow tall through the crown.
- Fix slouching: Tilt the seat pan forward 3 to 5 degrees to free hip rotation.
- Fix slouching: Slide the pelvis 1 cm forward on the seat if the low back collapses.
- Fix slouching: Breathe low into the belt line and keep exhale long for rhythm.
- Fix leaning back: Drop the back band to T12 to L1 and keep it snug not tight.
- Fix leaning back: Loosen back band tension by 10 to 15 mm if rotation sticks.
- Fix leaning back: Plant feet and micro hinge from the hips not the mid back.
- Fix leaning back: Edge the kayak from the hips first if chop or wind builds.
- Fix locked knees: Shorten foot pegs 1 click to land knee bend near 100 to 120 degrees.
- Fix locked knees: Keep 3 to 5 mm clearance at the heels for clean ankle flex.
- Fix locked knees: Pulse thigh contact to 2 to 3 out of 10 every 3 strokes.
- Fix locked knees: Shake out legs for 2 strokes after sprints or ferry moves.
- Spot symptoms: Numb feet, burning quads, sore low back, tight neck.
- Spot triggers: High seat, tight back band, long pegs, heavy grip.
- Spot context: Headwind, beam chop, long flats, cold water.
- Test neutral: Sit tall, lift the chest 1 cm, relax the jaw, soften the hands.
- Test neutral: Sweep the paddle through air for 5 strokes and feel torso rotation.
- Test neutral: Edge left and right 5 times and track hip freedom and thigh contact.
- Use sit in tweaks: Raise thigh pressure slightly on eddy lines and braces.
- Use sit in tweaks: Pad hip gaps to 3 to 5 mm if the boat slops side to side.
- Use sit in tweaks: Keep back band below the rear ribs for rotation space.
- Use sit on top tweaks: Add 1 pad under the seat to gain 3 degrees forward tilt.
- Use sit on top tweaks: Set thigh straps light for catch and release in surf.
- Use sit on top tweaks: Drive through the balls of the feet not the heels.
- Prevent relapse: Check knee angle at launch, mid run, take out.
- Prevent relapse: Reset seat tilt after shore breaks and gear shifts.
- Prevent relapse: Recalibrate posture after 15 minutes with a quick 3 cue scan.
Tips For Different Bodies And Conditions
I adjust my sit and contact points to match my body and the water. I keep neutral posture as the baseline, then tweak fit for control and comfort.
Body Type Considerations
- Set foot pegs to match leg length first. I keep 100–120° knee bend for most bodies, then add 5° more bend if my hamstrings feel tight, and subtract 5° if my ankles feel cramped (ACA coaching manuals).
- Add seat pan tilt to free hip rotation. I use 3–5° forward tilt for average hips, 2–3° for hypermobile hips, and 5–7° for tight hips or flat hamstrings (British Canoeing sea kayak guide).
- Place the back band low for rotation. I set the top edge 1–2 in below the iliac crest for trunk engagement, then drop 0.5 in if my lower back feels pinched, and raise 0.5 in if I lose support during sprints (ACA).
- Pad contact points to fit width. I aim for 3–6 mm hip pad gap for comfort, then add 2–3 mm foam shims if I slide during edge holds, and remove 2–3 mm if I lose rotation on sweeps.
- Tune thigh contact by body mass. I keep light contact for sub-160 lb paddlers for example small-framed paddlers, moderate contact for 160–210 lb paddlers for example medium builds, and firm strap tension for 210+ lb paddlers for example large builds when edging in chop.
- Choose foot pressure by height and seat height. I press 30–40% body force on foot pegs for tall paddlers for example 6 ft+ to avoid overextending knees, 20–30% for shorter paddlers for example under 5 ft 6 in to keep hips mobile, and 25–35% for mid-height paddlers for example 5 ft 7 in to 5 ft 11 in as a baseline.
- Protect sensitive backs with micro breaks. I reset posture every 5–7 minutes with 2–3 breaths and a gentle pelvic rock, then retension the back band one click if I feel slouch start (ACA).
- Adjust thigh strap angle for leg length. I set the strap crossing 1–2 in above the patella for long femurs, level with the patella for average femurs, and slightly below for short femurs to keep clean exits.
Sources: American Canoe Association skills manuals and discipline outlines, British Canoeing sea kayak and whitewater awards syllabi.
Calm Water Versus Rough Water
I change anchors and tension when the water changes. I keep rotation free in flat water, then trade some freedom for grip in chop.
| Setting | Calm Water | Rough Water |
|---|---|---|
| Foot pressure | 20–30% body force | 30–40% body force |
| Knee angle | 110–120° for easy rotation | 100–110° for bracing leverage |
| Thigh contact | Feather touch on braces | Firm contact on braces |
| Back band tension | Low to medium for trunk rotation | Medium to high for wave impacts |
| Seat pan tilt | 3–4° forward | 4–6° forward |
| Hip movement | Loose hips for glide | Active hips for edging |
| Cadence | 40–55 spm easy pace | 55–70 spm short bursts |
| Stroke length | Long exits for tracking | Short exits for control |
| Torso rotation | Full range 60–70° each side | Controlled range 45–60° each side |
| Brace readiness | Low hands relaxed | Elbows down quick low brace |
- Match hull type to conditions. I sit taller on sit-on-top seats for example 1–2 in above deck and keep faster cadence in chop, and I sit deeper in sit-in cockpits for example hips at or below deck and use stronger thigh drive for edges.
- Bias posture forward in wind. I hinge 5–10° at the hips to load the catch, then relax shoulders to avoid arm overwork.
- Preload for impacts. I engage core on the upwave beat, then release on the downwave to save energy.
- Stage hands for quick braces. I keep elbows below ribs and wrists neutral, then drop the back hand to brace as the bow lifts.
Sources: American Canoe Association Coastal and River Kayaking curricula, British Canoeing Performance Awards and Coaching resources.
Conclusion
Kayak posture is a living skill that grows with time on the water. I treat each launch as a fresh chance to notice what my body needs and make small tweaks. A few minutes of mindful setup pays off for the whole session.
Give yourself room to experiment. Try a short paddle then pause and check how your hips back and feet feel. If something feels sticky or tense shift one thing and test again. The sweet spot shows up when the boat feels quiet under you and your stroke feels easy.
Have fun out there and paddle with curiosity.
Frequently Asked Questions
What is the best sitting posture for kayaking?
Aim for a neutral posture: centered pelvis, stacked spine, relaxed shoulders, and active core. Keep a slight forward tilt at the hips, breathe low into your belly, and let your upper body stay loose. This setup boosts stability, comfort, and control while keeping the kayak responsive.
How should my feet, knees, and thighs be positioned?
Press lightly into the foot pegs, keep knees bent with gentle outward pressure, and maintain light, adjustable contact at the thighs. Increase contact in rough water for control; loosen it in calm water for comfort and rotation. Avoid locking your knees.
What’s the difference between sitting in a sit-in vs a sit-on-top kayak?
Sit-in: firm contact at feet, thighs, and lower back for edging and bracing. Fit matters: dial in foot peg distance, knee bend, hip pad clearance, and back band height. Sit-on-top: balance from the hips, drive from the feet, use thigh straps as needed, and keep seat height low for stability.
How high should my back band be?
Set the back band just below your rear ribs to support posture without blocking rotation. Keep tension snug but not restrictive. Too high makes you lean back; too low collapses your core. Adjust on the water and retest your forward stroke.
Should I tilt the seat pan forward?
Yes, a slight forward tilt helps stack your spine, frees hip rotation, and reduces lower back strain. Too much tilt can cause sliding or numb legs. Start small, test paddle, and fine-tune with cushioning or shims if needed.
What are common posture mistakes in a kayak?
Slouching, leaning back, straight legs, locked knees, and clamped shoulders. Fix by tilting the seat slightly forward, lowering back band tension, moving foot pegs a click closer, softening your grip, and keeping elbows below shoulder height.
How tight should my thigh braces or straps be?
Aim for light, ready contact you can increase on demand. In rough water, tighten slightly for edging and quick braces. In calm water, loosen for rotation and comfort. You should be able to exit quickly without getting stuck.
How do I adjust for calm vs rough water?
Calm: softer foot pressure, lighter thigh contact, lower back band tension, focus on rotation and long strokes. Rough: firmer foot drive, more thigh engagement, slightly higher back band tension, shorter strokes, and active hips for balance.
What are quick posture checks on the water?
- Hips centered, slight forward tilt
- Spine tall, shoulders relaxed
- Belly breathing, light core on
- Feet pressing, knees softly out
- Thighs ready, not clamped
- Elbows below shoulders, soft grip
How can hip mobility help my kayaking?
Small hip shifts keep you balanced in chop, improve edging, and reduce fatigue. Think “hips loose, core firm.” Let the boat move under you while your torso stays stable and rotates freely through the stroke.
How do I set foot peg distance correctly?
With feet on pegs, knees slightly bent and angled out, heels able to drop. You should reach full power without locking knees or sliding forward. If your lower back collapses or you can’t rotate, bring pegs a click closer.
What back pain fixes work while paddling?
Add a slight seat pan forward tilt, lower or relax the back band, engage your core, and keep shoulders down. Take micro-breaks: exhale, reset tall spine, and rotate from the ribs. If pain persists, reduce tension at thighs and pegs.
How should beginners start with kayak posture?
Start neutral: tall spine, soft knees, light foot pressure, relaxed shoulders. Keep contact light and adjustable. Practice belly breathing and gentle hip mobility in calm water before adding power or edging.
Are there guidelines I can follow for proper fit?
Yes. The article’s cues align with American Canoe Association and British Canoeing guidance: slight seat pan tilt forward, back band below ribs, light thigh contact, and knee bend that allows rotation and quick bracing. Always test and fine-tune on the water.
How do I adjust posture for my body type?
- Long legs: move pegs closer, add seat tilt for rotation.
- Short torso: lower back band slightly to avoid blocking twist.
- Broad hips: keep small gap at hip pads; avoid over-tightening.
- Tight hamstrings: add seat tilt or thin pad under sit bones.